In part 2 I covered the process of optimising my Tube Tracker application for the browser but each change I made still required refreshing the browser to check everything was still working. The application really needed a test suite to help speed up the development process and avoid accidental regressions. As it turns out, this was easier said than done when working with a new technology like React.
The testing setup
I’m using the Jasmine test framework because it’s straightforward to setup and widely used, including by the React project itself. The application now includes a test folder with two subfolders; lib containing any utilities required for running tests and spec containing the tests themselves:
tube-tracker/
├── app/
├── public/
└── test/
    ├── lib/
    │   └── jasmine-2.0.0/
    ├── spec/
    │   ├── common/
    │   ├── component/
    │   ├── bundle.js
    │   └── suite.js
    └── SpecRunner.html
In addition to the development and production JavaScript bundles I covered in my last article a test bundle has been added to wrap up the tests and application together. To do this I require all of the spec files into the new suite.js file and use that as the entry point for Browserify:
$ browserify -e test/spec/suite.js -t reactify -o test/spec/bundle.jsThe test bundle creation could be improved with some added automation but the basic process works. The simplicity of the setup also means that the tests are run in a web browser rather than in a simulated environment such as jsdom.
Testing React components
If React is the V in MVC then theoretically only the output of each component should be tested, but React components often contain logic to handle dynamic behaviour and simple applications can be entirely composed of them. Inside the components of my Tube Tracker application for example there is logic to validate user input, setup an AJAX poll and display different states. Testing only the output therefore does not provide enough information when something goes wrong inside so some of the underlying implementation needs testing too.
React test utilities
To make testing React components a little easier the React provides a test utilities (TestUtils) add-on which is probably the first thing you’ll find when searching for information about testing React applications. It can be used by including the React package with add-ons into the test files. Under the React.addons.TestUtils namespace there are methods to simulate events, filter rendered components and test their type.
There is a useful renderIntoDocument method which will conveniently render components to a detached DOM node, but for some tests there remains a need to reference the container, either for capturing events or to test the lifecycle methods when a component is destroyed:
describe("A component", function () {
  var instance;
  var container = document.createElement("div");

  afterEach(function () {
    if (instance && instance.isMounted()) {
      // Only components with a parent will be unmounted
      React.unmountComponentAtNode(React.findDOMNode(instance).parentNode);
    }
  });

  describe("rendered without a container reference", function () {
    beforeEach(function () {
      // This component does not use any lifecycle methods or broadcast
      // events so it does not require rendering to the DOM to be tested.
      instance = TestUtils.renderIntoDocument(<Component title="Hello World" />);
    });

    it("should render a heading with the given text", function () {
      // TestUtils provide methods to filter the rendered DOM so that
      // individual components may be inspected easily.
      var heading = TestUtils.findRenderedDOMComponentWithTag(instance, "h1");
      expect(React.findDOMNode(heading).textContent).toBe("Hello World");
    });
  });

  describe("with a container reference required", function () {
    beforeEach(function () {
      // This component broadcasts events and has lifecycle methods
      // so it should be rendered into an accessible container.
      instance = React.render(<Component />, container);

      this.eventSpy = jasmine.createSpy();
      container.addEventListener("broadcast", this.eventSpy, false);
    });

    afterEach(function () {
      container.removeEventListener("broadcast", this.eventSpy, false);
    });

    it("should broadcast with data when component is clicked", function () {
      // TestUtils can simulate events
      TestUtils.Simulate.click(React.findDOMNode(instance));
      expect(this.eventSpy).toHaveBeenCalledWith("some", "data");
    });
  });
});
TestUtils makes interacting with and testing the output of components very simple but inspecting any of the internal implementation is not.
Inspecting components in detail
The views of an application, when sticking to the MVC pattern, do not contain much logic other than a few conditional blocks or loops and anything more taxing should be handled before passing data to the view. React applications do not fit into this model, components may be small applications-in-themselves and sometimes their internals need inspecting.
The Tube Tracker has components nested up to four levels and most of the applications logic is inside them.
Attempting to unit test each of a components methods won’t get you very far because although the methods can be accessed they cannot be modified, at least without digging into Reacts internals. Setting stubs and spies is therefore not sensible, which initially seems a shame.
The key is to not create testing blind spots. If you start to feel concerned that a piece of logic should be targeted for testing–code that may not directly affect the output–then abstract it out. Back within the component the external logic can then be stubbed out.
Stubbing CommonJS modules
I want to test each module in isolation because working with the entire component tree would be inefficient to debug should an error occur and is likely to introduce issues such as tests not running entirely independently. The problem is that CommonJS modules create their own scope and only properties explicitly declared as public can be accessed by their dependents. This poses a problem for testing because a modules dependencies are not usually made public. For example in the Tube Tracker application the component tube-tracker.js has the dependencies network.js and predictions.js:
/** @jsx React.DOM */
var React = require("react");
var Predictions = require("./predictions");
var Network = require("./network");

var TubeTracker = React.createClass({
  render: function () {
    return (
      <div className="layout">
        <div className="layout__sidebar">
          <Network networkData={this.props.networkData} />
        </div>
        <div className="layout__content">
          <Predictions line={this.state.line} station={this.state.station} networkData={this.props.networkData} />
        </div>
      </div>
    );
  }
});

module.exports = TubeTracker;To get around the lack of visibility into the module I could change each module so that their dependencies must be passed into them rather than hard-wired inside, a basic inversion of control (IoC) pattern. Utilising an IoC pattern would probably lead to dependency spaghetti without some form of dependency injection to manage it. But, dependency injection is not a paradigm that’s particularly popular with JavaScript projects because it requires rigidly obeying conventions and implementations can be very different.
Fortunately, there are much simpler means to getting inside CommonJS modules and fiddling with them. For Node.js there is Rewire and a version of it for the browser can be baked into the test build with the Rewireify transform available for Browserify:
$ npm install --save-dev rewireify
$ browserify -e test/spec/suite.js -t reactify -t rewireify -o test/spec/bundle.js
Rewireify is very simple, it injects __get__ and __set__ methods into each module so that their internals can be exposed. The dependencies of a module can now be swapped with stubs:
/** @jsx React.DOM */
var React = require("react/addons");
var TubeTracker = require("../../../app/component/tube-tracker");
var stubComponent = require("../../lib/stub/component");

describe("Tube Tracker", function () {
  var TestUtils = React.addons.TestUtils;

  beforeEach(function () {
    this.original = {
      network: TubeTracker.__get__("Network"),
      predictions: TubeTracker.__get__("Predictions")
    };

    this.stubbed ={
      network: stubComponent(),
      predictions: stubComponent()
    };

    TubeTracker.__set__({
      Network: this.stubbed.network,
      Predictions: this.stubbed.predictions
    });
  });

  afterEach(function () {
    TubeTracker.__set__({
      Network: this.original.network,
      Predictions: this.original.predictions
    });
  });
});Stubbing dependencies is now very easy but components in particular need special treatment. TestUtils provides the mockComponent method which can modify a given component with stubbed output but otherwise does not appear to do much else. It’s easier in fact to create your own stubbed components, which I found was especially true for some asynchronous tests.
Asynchronous component testing
Not all tests can be forced to run synchronously, in the case of the Tube Tracker the Predictions component will always display an instance of Message before displaying the DepartureBoard. Without being able to spy on or stub a component’s lifecycle methods, such as componentDidMount and componentWillUnmount, this is a problem because you don’t know when they’re created or destroyed.
To get around this I created a utility function to provide better component stubs. The function accepts callbacks for the lifecycle methods so it’s really straightforward to insert the test runners callbacks into them:
var React = require("react");

module.exports = function (mount, unmount) {
  var mixins = [];

  if (mount) {
    mixins.push({
      componentDidMount: function () {
        mount.call(this);
      }
    });
  }

  if (unmount) {
    mixins.push({
      componentWillUnmount: function () {
        unmount.call(this);
      }
    });
  }

  return React.createClass({
    mixins: mixins,
    render: function () {
      return React.createElement("div");
    }
  });
};In summary
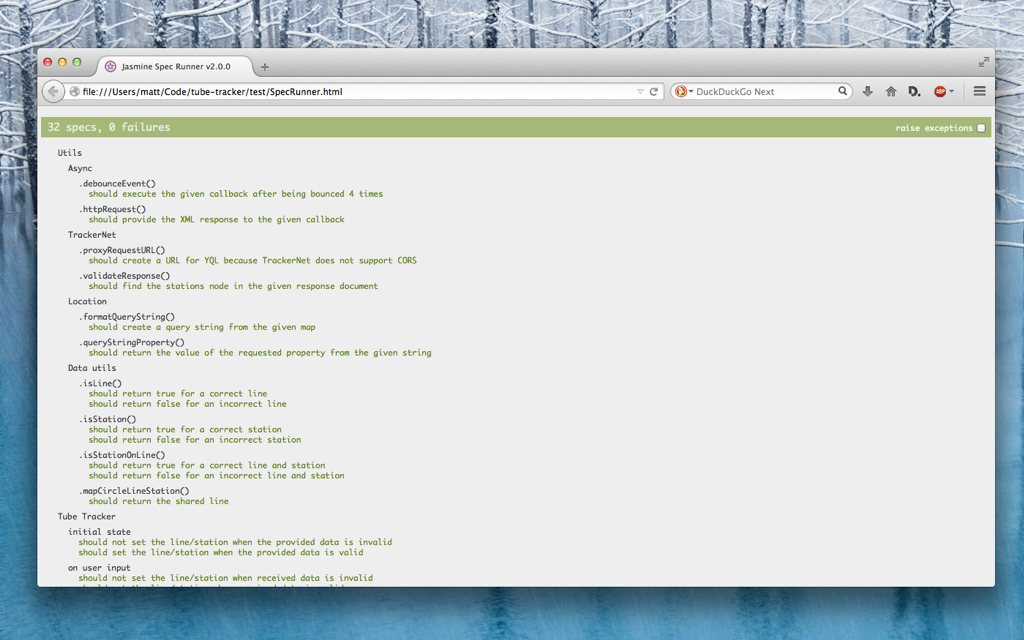
Testing my React application was a lot more work than I had anticipated. This is new technology and we’re all still learning how best to use it. I spent a lot of time digging into React’s internals to see how stuff worked. I don’t want to advocate everything I’ve done as best practice but there’s not much information yet out there. The important thing is, it works!:
You can test the app right now (note: It’s running on a free account so this link may not be reliable) or head over to GitHub to check out the source code. Please leave a comment or send me a tweet, I’d love some feedback and in the fourth installment of this series I’ll be tackling server-side rendering.